Are you craving restaurant-style Chicken Biryani but intimidated by the cooking process? You are in the right place! This Chicken Biryani recipe is designed specifically for beginners who want to achieve that authentic taste and aroma at home without the fuss.
Biryani is more than just food; it’s an emotion. A fragrant combination of long-grain Basmati rice, tender spiced chicken, and caramelized onions, this dish is the star of Indian cuisine. Whether for a Sunday lunch or a special dinner party, this homemade chicken biryani is sure to impress. In this guide, we break down the process into simple, manageable steps—from marinating the chicken to the final “dum” cooking technique. Let’s get cooking!
Also Read – Spicy Masala Rice Recipe | Tasty Leftover Rice Makeover
Ingredients List:
- For Rice Preparation:
- 500g Basmati Rice (Old basmati is best; soaked for 1 hour)
- 3 Liters Water
- 2 Bay Leaves (Tej Patta)
- 1 Black Cardamom (Badi Elaichi)
- 3 Green Cardamoms (Hari Elaichi)
- 2 small Star Anise (Chakri Phool)
- 1-inch Cinnamon Stick (Dalchini)
- 4 Cloves (Laung)
- 6 Black Peppers (Kali Miri)
- 1 tsp Cumin Seeds (Jeera)
- 2 Green Chillies (Slit)
- Juice of 1/2 Lemon
- 2 tsp Salt
- 1 tbsp Ghee
- For Fried Onions (Birista):
- 350g Onions (Thinly sliced)
- Oil (for deep frying)
- For Chicken Marination:
- 500g Chicken (clean and washed)
- Juice of 1/2 Lemon
- 1.5 tbsp Ginger-Garlic Paste
- 3 Green Chillies (Chopped)
- 1/4 tsp Turmeric Powder (Haldi)
- 1 tbsp Kashmiri Red Chilli Powder (for colour)
- 1 tsp Coriander Powder (Dhaniya)
- 1/2 tsp Cumin Powder (Jeera)
- 1.5 tbsp Biryani Masala
- 1/4 tsp Kasuri Methi (Dried Fenugreek Leaves)
- Handful of fresh Mint (Pudina) & Coriander leaves (Chopped)
- 1.5 tbsp Oil
- 1 tbsp Ghee
- Salt to taste
- 150-200g Fresh Curd/Dahi (Not too sour)
- Handful of prepared Fried Onions
- For Cooking Base, Layering & Dum:
- 1 tbsp Oil
- 2 tbsp Ghee
- 1 tsp Biryani Masala
- Fresh Mint & Coriander leaves
- Saffron soaked in warm milk (Kesar milk)
Also Read – The Best Paneer Fried Rice You’ll Ever Eat
Step-by-Step Instructions:
- Step 1: Prep the Onions (Birista):
- Slice the onions thinly. Heat oil in a pan and deep fry the onions until they turn golden brown and crispy.
- Drain them on a paper towel and set aside. These fried onions add a sweet, caramelized flavour.
- Step 2: Marinate the Chicken:
- In a large bowl, take the cleaned chicken. Add lemon juice, ginger-garlic paste, and green chillies.
- Add all the dry spices: turmeric, Kashmiri chilli powder, coriander powder, cumin powder, and Biryani Masala.
- Add crushed Kasuri methi, chopped mint, and coriander.
- Pour in the oil, ghee, and fresh curd. Add salt and a handful of the crushed fried onions.
- Mix everything well by hand. Cover and let it marinate for at least 30 minutes to 1 hour (or overnight in the fridge for best results).
- Step 3: Cook the Rice:
- Boil 3 liters of water in a large pot. Add all the whole spices (bay leaf, cardamoms, cinnamon, etc.), green chillies, salt, and lemon juice.
- Add the soaked and drained Basmati rice to the boiling water.
- Cook on high heat until the rice is 80-90% cooked (it should still have a slight bite).
- Drain the water completely and fluff the rice gently with a fork.
- Step 4: Cook the Chicken Base:
- Heat 1 tbsp Oil and 2 tbsp Ghee in a heavy-bottomed pot (or the vessel you plan to use for Dum).
- Add the marinated chicken to the pot.
- Cover the pot with a lid and cook on medium heat for 10 to 15 minutes.
- Stir occasionally. Cook until the chicken is tender and the oil starts to separate from the masala. This ensures the chicken is cooked perfectly before layering.
- Step 5: Layering the Biryani:
- Once the chicken base is ready, lower the flame. Spread the chicken evenly at the bottom.
- Sprinkle a little extra Biryani Masala, fresh mint, and coriander over the chicken.
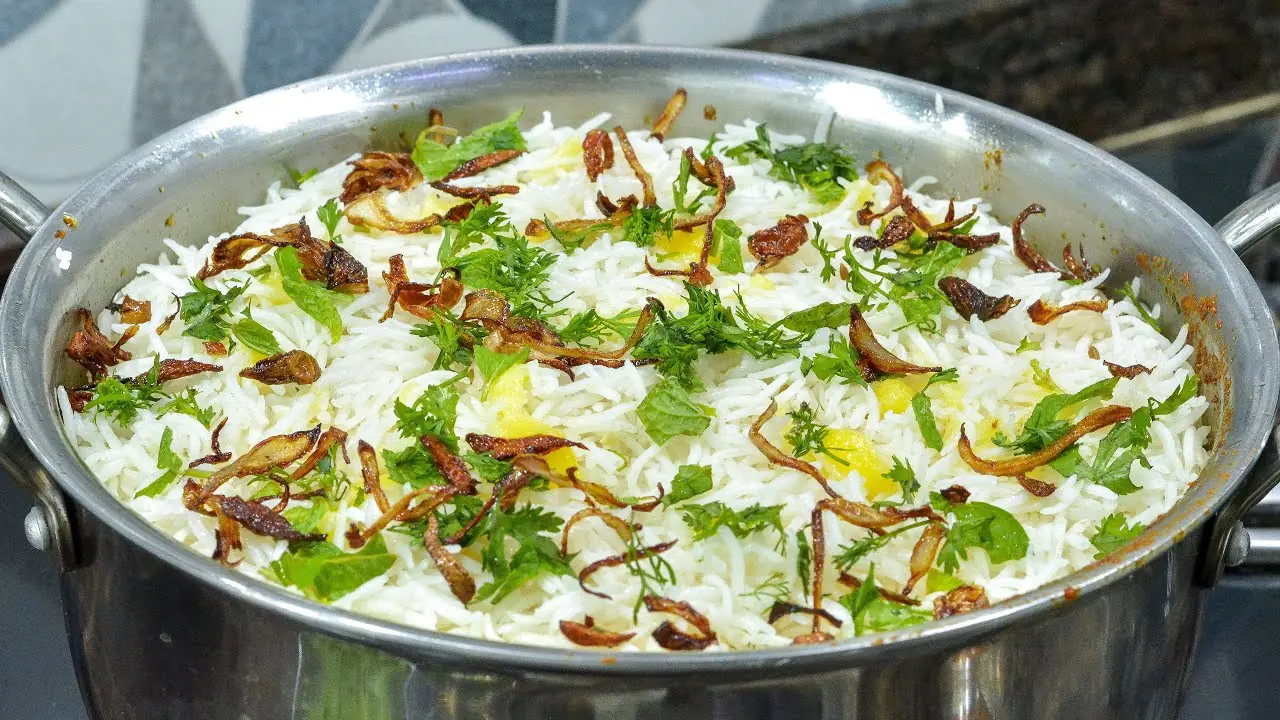
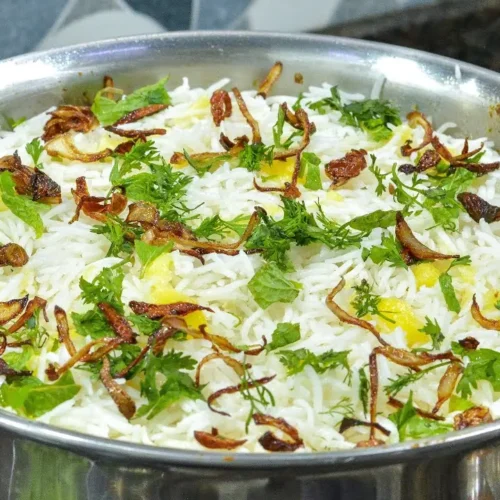
- Layer the cooked rice evenly over the chicken base.
- Top with the remaining fried onions, a drizzle of ghee, and the saffron milk mixture.
- Step 6: The Dum Process (Steaming):
- Cover the pot with a tight lid. You can seal the edges with wheat dough or place a heavy weight on top to trap the steam. Alternatively, place a cloth between the pot and lid.
- Place a tawa (griddle) on the stove and heat it. Place your biryani pot on top of the tawa.
- Cook on high flame for the first 5 minutes, then lower the flame and cook for 15 minutes.
- Turn off the heat and let it rest for another 10 minutes before opening.
- Serve hot!
Also Read – Spicy Pudina Mirch Recipe | Maharashtrian Green Chilli Mint Fry
Cooking Tips for Perfect Biryani:
- Rice Quality: Always use “Old Basmati Rice” for biryani. Aged rice grains stay separate and fluffier compared to new rice, which can become sticky.
- The “Dum” Technique: Using a tawa under the pot prevents the chicken at the bottom from burning while ensuring the heat distributes evenly.
- Don’t Overcook Rice: Since the rice will cook further during the “Dum” phase, ensure it is slightly undercooked (80%) when boiling.
- Fried Onions: Don’t skip the fried onions (Birista); they provide the signature authentic biryani flavour.
Variations:
- Spicy Version: Increase the amount of green chillies and red chilli powder in the marinade if you prefer a hotter biryani.
- Vegetarian Version: Replace chicken with mixed vegetables like carrots, beans, cauliflower, and potatoes.
- Egg Biryani: Use boiled eggs coated in spices instead of chicken.
- Kids-Friendly: Reduce the chilli powder and green chillies. The aromatic spices will still make it delicious without the heat.
Serving Suggestions:
- Raita: A cool cucumber or boondi raita balances the spices perfectly.
- Salad: Fresh sliced onions, tomatoes, and cucumber with a squeeze of lime.
- Mirchi Ka Salan: For a traditional Hyderabadi experience, serve with this peanut and chilli curry.
Also Read – Spicy Roasted Garlic & Kokum Side Dish | Lasun Aagal Recipe
FAQs:
Q1: Can I use normal rice instead of Basmati?
Ans: While you can use normal rice, authentic Chicken Biryani is best made with long-grain Basmati rice for that signature aroma and fluffy texture.
Q2: How long should I marinate the chicken?
Ans: A minimum of 30 minutes is required, but marinating for 1-2 hours allows the flavours to penetrate deep into the chicken, making it tender and juicy.
Q3: Why is my biryani rice sticky?
Ans: This usually happens if the rice is overcooked during the boiling stage or if “new” rice is used. Always buy aged rice and drain it well before layering.
Q4: What is the ratio of chicken to rice?
Ans: A 1:1 ratio is standard. For 1 kg of chicken biryani, use 1 kg of chicken and 1 kg of rice.
Easy Chicken Biryani Recipe: Step-by-Step Guide for Beginners
Ingredients
For Rice Preparation:
- 500 g Basmati Rice Old basmati is best; soaked for 1 hour
- 3 Liters Water
- 2 Bay Leaves Tej Patta
- 1 Black Cardamom Badi Elaichi
- 3 Green Cardamoms Hari Elaichi
- 2 small Star Anise Chakri Phool
- 1- inch Cinnamon Stick Dalchini
- 4 Cloves Laung
- 6 Black Peppers Kali Miri
- 1 tsp Cumin Seeds Jeera
- 2 Green Chillies Slit
- Juice of 1/2 Lemon
- 2 tsp Salt
- 1 tbsp Ghee
For Fried Onions (Birista):
- 350 g Onions Thinly sliced
- Oil for deep frying
For Chicken Marination:
- 500 g Chicken clean and washed
- Juice of 1/2 Lemon
- 1.5 tbsp Ginger-Garlic Paste
- 3 Green Chillies Chopped
- 1/4 tsp Turmeric Powder Haldi
- 1 tbsp Kashmiri Red Chilli Powder for colour
- 1 tsp Coriander Powder Dhaniya
- 1/2 tsp Cumin Powder Jeera
- 1.5 tbsp Biryani Masala
- 1/4 tsp Kasuri Methi Dried Fenugreek Leaves
- Handful of fresh Mint Pudina & Coriander leaves (Chopped)
- 1.5 tbsp Oil
- 1 tbsp Ghee
- Salt to taste
- 150-200 g Fresh Curd/Dahi Not too sour
- Handful of prepared Fried Onions
For Cooking Base, Layering & Dum:
- 1 tbsp Oil
- 2 tbsp Ghee
- 1 tsp Biryani Masala
- Fresh Mint & Coriander leaves
- Saffron soaked in warm milk Kesar milk
Instructions
Step 1: Prep the Onions (Birista)
- Slice the onions thinly. Heat oil in a pan and deep fry the onions until they turn golden brown and crispy.
- Drain them on a paper towel and set aside. These fried onions add a sweet, caramelized flavour.
Step 2: Marinate the Chicken
- In a large bowl, take the cleaned chicken. Add lemon juice, ginger-garlic paste, and green chillies.
- Add all the dry spices: turmeric, Kashmiri chilli powder, coriander powder, cumin powder, and Biryani Masala.
- Add crushed Kasuri methi, chopped mint, and coriander.
- Pour in the oil, ghee, and fresh curd. Add salt and a handful of the crushed fried onions.
- Mix everything well by hand. Cover and let it marinate for at least 30 minutes to 1 hour (or overnight in the fridge for best results).
Step 3: Cook the Rice
- Boil 3 liters of water in a large pot. Add all the whole spices (bay leaf, cardamoms, cinnamon, etc.), green chillies, salt, and lemon juice.
- Add the soaked and drained Basmati rice to the boiling water.
- Cook on high heat until the rice is 80-90% cooked (it should still have a slight bite).
- Drain the water completely and fluff the rice gently with a fork.
Step 4: Cook the Chicken Base
- Heat 1 tbsp Oil and 2 tbsp Ghee in a heavy-bottomed pot (or the vessel you plan to use for Dum).
- Add the marinated chicken to the pot.
- Cover the pot with a lid and cook on medium heat for 10 to 15 minutes.
- Stir occasionally. Cook until the chicken is tender and the oil starts to separate from the masala. This ensures the chicken is cooked perfectly before layering.
Step 5: Layering the Biryani
- Once the chicken base is ready, lower the flame. Spread the chicken evenly at the bottom.
- Sprinkle a little extra Biryani Masala, fresh mint, and coriander over the chicken.
- Layer the cooked rice evenly over the chicken base.
- Top with the remaining fried onions, a drizzle of ghee, and the saffron milk mixture.
Step 6: The Dum Process (Steaming)
- Cover the pot with a tight lid. You can seal the edges with wheat dough or place a heavy weight on top to trap the steam. Alternatively, place a cloth between the pot and lid.
- Place a tawa (griddle) on the stove and heat it. Place your biryani pot on top of the tawa.
- Cook on high flame for the first 5 minutes, then lower the flame and cook for 15 minutes.
- Turn off the heat and let it rest for another 10 minutes before opening.
- Serve hot!