Craving a delightful, crispy snack that’s perfect with your evening tea or coffee? Look no further than Namkeen Masaledar Shankarpali! This savoury semolina (rava) snack is a popular Maharashtrian treat, known for its incredible crunch and flavorful spice blend. Unlike its sweet counterpart, these Crispy Rava Shankarpali are seasoned with aromatic spices, making them irresistibly delicious. This easy Shankarpali recipe is fantastic for beginners, using simple ingredients and straightforward steps. Forget store-bought snacks; once you try this homemade version, it will surely become your new favourite! Get ready to impress your family and friends with this perfectly spiced savoury semolina snack.
Also Read – Salted Shankarpali Recipe | Easy Kharya Shankarpalya Recipe
Ingredients List:
- 500 g (approximately 2.5 cups) fine semolina (rava)
- Water (for kneading)
- Oil (for deep frying)
- For the Spice Mix:
- ½ tsp Amchur (dry mango) powder
- ½ tsp Chaat Masala
- Salt to taste (remember we added salt to the dough)
- 1 tsp Red Chilli Powder (a mix of colour and spice is good)
- A pinch of powdered sugar (optional, for balance)
Step-by-step Instructions:
- Prepare the Semolina: If your semolina is coarse, lightly blend it in a mixer to make it finer. Transfer the fine semolina to a bowl.
- Add Salt to Semolina: Add salt to the semolina and mix well. The salt should be evenly distributed.
- Knead the Dough: Gradually add plain water to the semolina and knead a soft, loose dough. The dough needs to be soft because the semolina will absorb water and swell, making it firmer.
- Rest the Dough: Cover the dough with a damp cloth (wrung out tightly) and let it rest for at least 30 minutes. This allows the semolina to absorb moisture and become pliable.
- Re-knead the Dough: After resting, the dough will be firmer. Knead it again without adding any oil or water until it’s smooth and pliable.
- Divide the Dough: Divide the dough into small, equal-sized portions. Keep the unused dough covered with the damp cloth.
- Roll the Dough: Take one portion and roll it out like a thin chapati or tortilla. Do not use any flour or oil for rolling, as the dough should not stick.
- Fold the Dough: Fold the rolled dough once and then again to create layers, similar to how you would fold a paratha. This helps create a flaky texture.
- Roll Again: Roll the folded dough again into a round, even thickness. Neither too thick nor too thin.
- Cut the Shankarpali: Using a pizza cutter or a knife, make parallel cuts, and then cross-cuts to create diamond shapes (or your preferred shape) for the Namkeen Masaledar Shankarpali.
- Heat the Oil: Heat oil in a kadai (deep frying pan) until it is very hot. A simple test is to drop a tiny piece of dough; it should sizzle and rise immediately.
- Fry the Shankarpali: Reduce the flame to medium. Carefully add the cut shankarpali into the hot oil. Do not overcrowd the pan.
- Stir and Fry: Gently stir the rava Shankarpali as they fry. They will initially stick together but will separate as they cook and puff up.
- Increase Flame: Increase the flame to high and continue frying until they turn a beautiful golden brown and are super crispy.
- Drain Excess Oil: Remove the fried crispy Shankarpali with a slotted spoon and place them on a plate lined with absorbent paper to drain excess oil.
- Prepare Spice Mix: In a small bowl, combine amchur powder, chaat masala, salt, red chilli powder, and a pinch of powdered sugar (if using). Mix well to ensure no lumps.
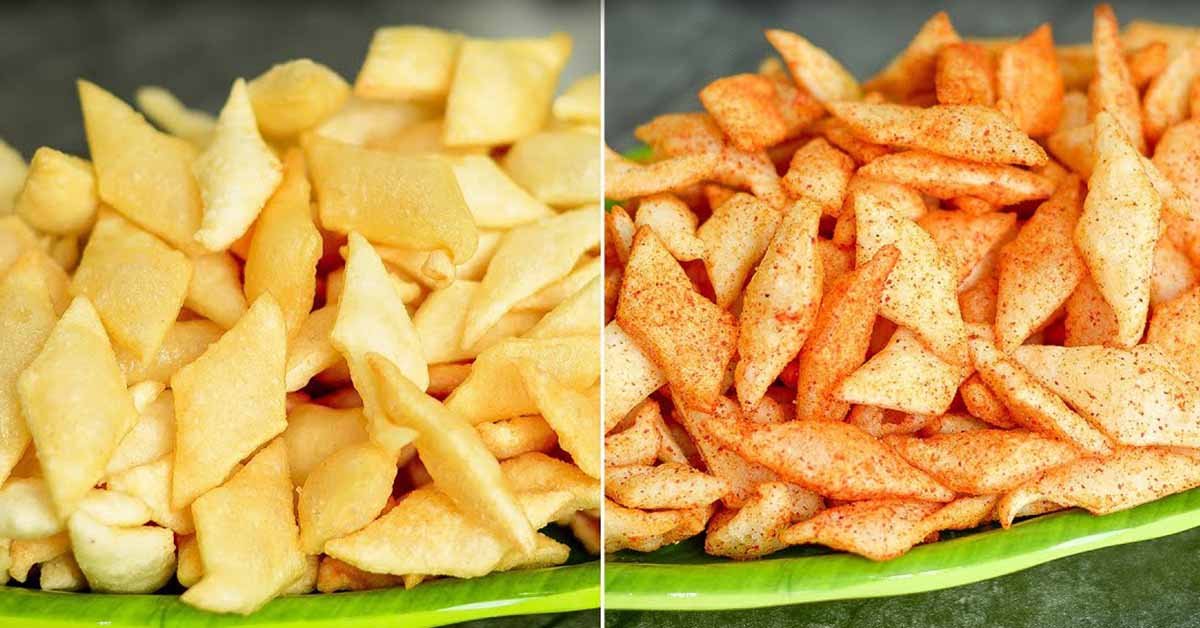
- Seasoning the Shankarpali: While the Shankarpali are still hot, transfer half of them to a bowl. Sprinkle the prepared spice mix over them.
- Toss to Coat: Gently toss or shake the bowl to evenly coat the hot Namkeen Masaledar Shankarpali with the spice mix. Repeat for the remaining Shankarpali.
- Cool and Store: Let the Shankarpali cool completely before storing them in an airtight container.
Also Read – Crispy Shankarpali Recipe: A Simple Step-by-Step Guide
Cooking Tips for Better Results:
- Semolina Quality: Using fine semolina is key for a smooth dough and crispier Shankarpali. If you only have coarse semolina, pulse it a few times in a mixer.
- Dough Consistency: Kneading a loose dough initially is important as semolina absorbs a lot of water. The resting period is crucial for the dough to firm up and become manageable.
- Layering for Fluffiness: Folding the dough multiple times before the final roll helps create layers, resulting in lighter and crispier Shankarpali.
- Oil Temperature: Ensure the oil is hot enough before frying (medium-high flame). If the oil isn’t hot enough, the Shankarpali will absorb too much oil and become soggy. If it’s too hot, they’ll brown too quickly without cooking through.
- Don’t Overcrowd: Fry in batches to maintain oil temperature and ensure even cooking.
- Seasoning While Hot: Sprinkle the spice mix while the Shankarpali are still hot. This allows the spices to adhere better and infuse their flavour.
Variations:
- Spicy Kick: Increase the amount of red chilli powder or add a pinch of black pepper to the spice mix for extra heat.
- Herbal Flavour: Incorporate finely chopped fresh coriander or dried fenugreek leaves (kasuri methi) into the dough for an aromatic twist.
- Garlic Infusion: Add a teaspoon of garlic powder to the spice mix for a pungent flavour.
- Kids-Friendly: Reduce or omit the red chilli powder and use only chaat masala and a little salt for a milder version.
Also Read – Crispy Kadakani Recipe: Perfect Maharashtrian Navratri Dish
Serving Suggestions:
Namkeen Masaledar Shankarpali are best enjoyed as a snack on their own with a cup of hot tea or coffee. They are also perfect to serve to guests as a crunchy accompaniment.
FAQs:
Q1: What is Namkeen Masaledar Shankarpali?
Ans: Namkeen Masaledar Shankarpali is a traditional Indian savoury snack, particularly popular in Maharashtra. It’s made from semolina (rava), deep-fried until crispy, and then seasoned with a special blend of spices, making it a delicious savoury tea-time snack.
Q2: How long can I store these crispy rava Shankarpali?
Ans: When stored in an airtight container, these crispy rava Shankarpali can remain fresh and crunchy for up to a month. Ensure they are completely cool before storing.
Q3: Can I bake these Shankarpali instead of frying?
Ans: While the traditional method is deep-frying for maximum crispiness, you can experiment with baking them. However, the texture might be slightly different. Bake at 180°C (350°F) until golden brown and crisp, flipping halfway through.
Q4: Can I make the dough ahead of time for this easy Shankarpali recipe?
Ans: Yes, you can prepare the dough for Shankarpali a few hours in advance and keep it covered with a damp cloth in the refrigerator. Just bring it to room temperature and re-knead before rolling and frying.
Q5: What makes these Namkeen Masaledar Shankarpali so crispy?
Ans: The crispiness of these rava Shankarpali comes from using fine semolina, proper kneading, resting the dough, and frying them at the correct oil temperature until golden brown. The layering technique also contributes to their flaky texture.

Crispy Namkeen Masaledar Rava Shankarpali Recipe
Ingredients
- 500 g approximately 2.5 cups fine semolina (rava)
- Water for kneading
- Oil for deep frying
- For the Spice Mix:
- ½ tsp Amchur dry mango powder
- ½ tsp Chaat Masala
- Salt to taste remember we added salt to the dough
- 1 tsp Red Chilli Powder a mix of colour and spice is good
- A pinch of powdered sugar optional, for balance
Instructions
- Prepare the Semolina: If your semolina is coarse, lightly blend it in a mixer to make it finer. Transfer the fine semolina to a bowl.
- Add Salt to Semolina: Add salt to the semolina and mix well. The salt should be evenly distributed.
- Knead the Dough: Gradually add plain water to the semolina and knead a soft, loose dough. The dough needs to be soft because the semolina will absorb water and swell, making it firmer.
- Rest the Dough: Cover the dough with a damp cloth (wrung out tightly) and let it rest for at least 30 minutes. This allows the semolina to absorb moisture and become pliable.
- Re-knead the Dough: After resting, the dough will be firmer. Knead it again without adding any oil or water until it's smooth and pliable.
- Divide the Dough: Divide the dough into small, equal-sized portions. Keep the unused dough covered with the damp cloth.
- Roll the Dough: Take one portion and roll it out like a thin chapati or tortilla. Do not use any flour or oil for rolling, as the dough should not stick.
- Fold the Dough: Fold the rolled dough once and then again to create layers, similar to how you would fold a paratha. This helps create a flaky texture.
- Roll Again: Roll the folded dough again into a round, even thickness. Neither too thick nor too thin.
- Cut the Shankarpali: Using a pizza cutter or a knife, make parallel cuts, and then cross-cuts to create diamond shapes (or your preferred shape) for the Namkeen Masaledar Shankarpali.
- Heat the Oil: Heat oil in a kadai (deep frying pan) until it is very hot. A simple test is to drop a tiny piece of dough; it should sizzle and rise immediately.
- Fry the Shankarpali: Reduce the flame to medium. Carefully add the cut shankarpali into the hot oil. Do not overcrowd the pan.
- Stir and Fry: Gently stir the rava Shankarpali as they fry. They will initially stick together but will separate as they cook and puff up.
- Increase Flame: Increase the flame to high and continue frying until they turn a beautiful golden brown and are super crispy.
- Drain Excess Oil: Remove the fried crispy Shankarpali with a slotted spoon and place them on a plate lined with absorbent paper to drain excess oil.
- Prepare Spice Mix: In a small bowl, combine amchur powder, chaat masala, salt, red chilli powder, and a pinch of powdered sugar (if using). Mix well to ensure no lumps.
- Seasoning the Shankarpali: While the Shankarpali are still hot, transfer half of them to a bowl. Sprinkle the prepared spice mix over them.
- Toss to Coat: Gently toss or shake the bowl to evenly coat the hot Namkeen Masaledar Shankarpali with the spice mix. Repeat for the remaining Shankarpali.
- Cool and Store: Let the Shankarpali cool completely before storing them in an airtight container.